The software being used is free and allows you to have a discreet yet visible watermark on your pictures, it also allows you to watermark multiple pictures at once which is really a plus compare to other software.
So here are two ways to watermark your pictures with Faststone Viewer
Part 1
Watermarking using your name/company name
First go to http://www.faststone.org/ to Download FastStone Viewer
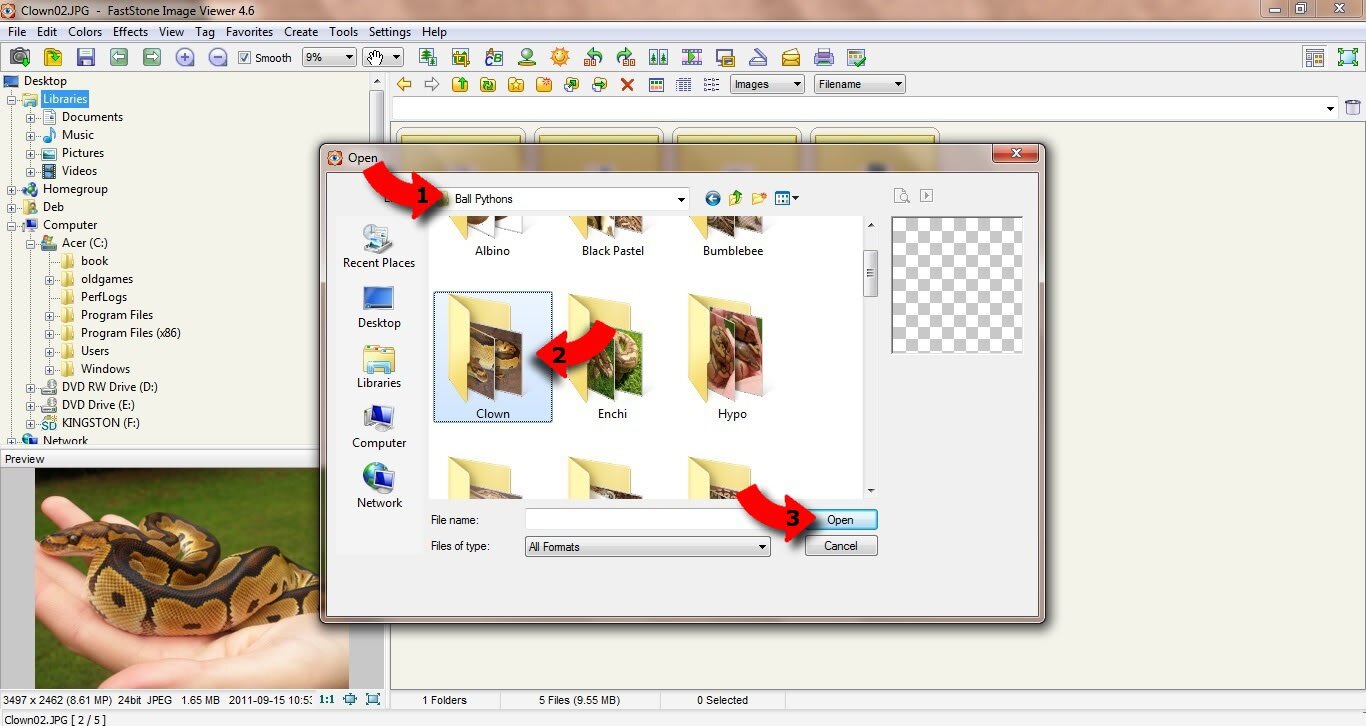
- Launch FastStone program, click on file in the top left corner and open.
- Select the folder containing the pictures you wish to watermark (1&2) and click open (3).
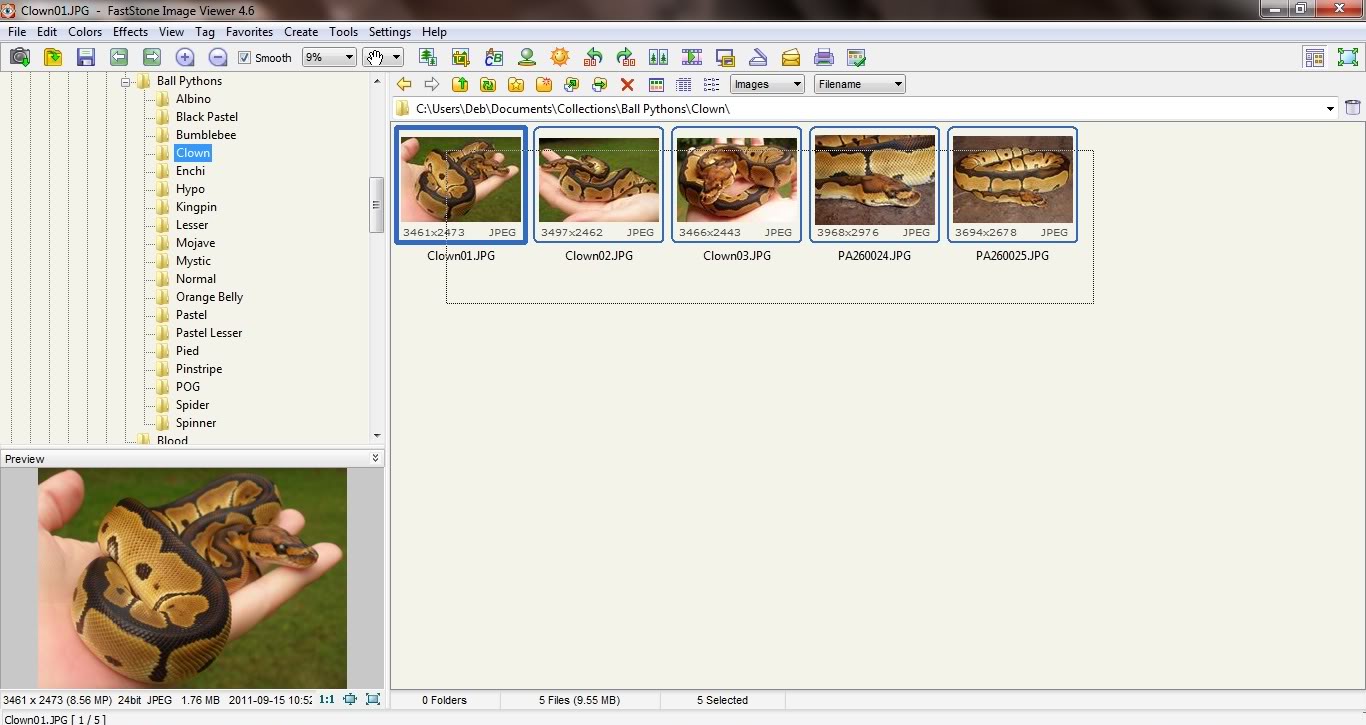
- Highlight the images you wish to convert.
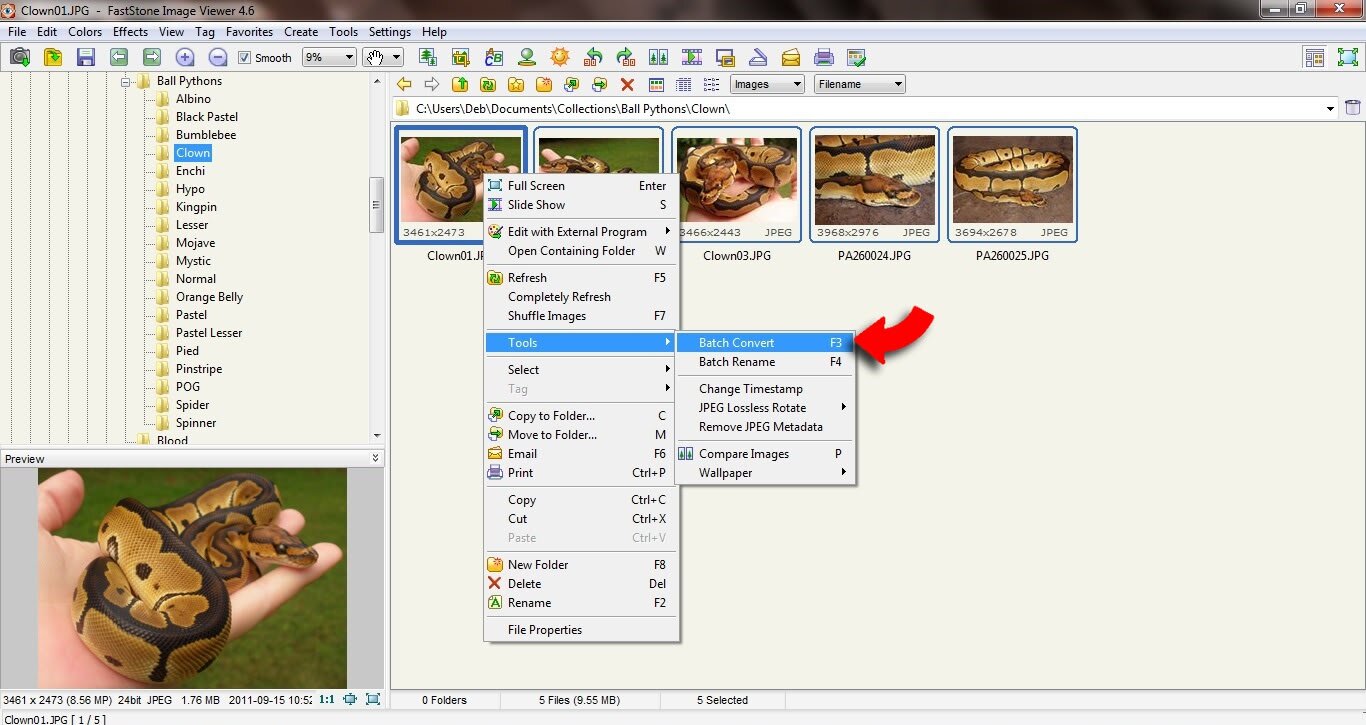
- Click right, select tools followed by batch convert.
- Click on browse to select the output folder.
- Click on create new folder.
- Name your new folder (1) and click ok (2).
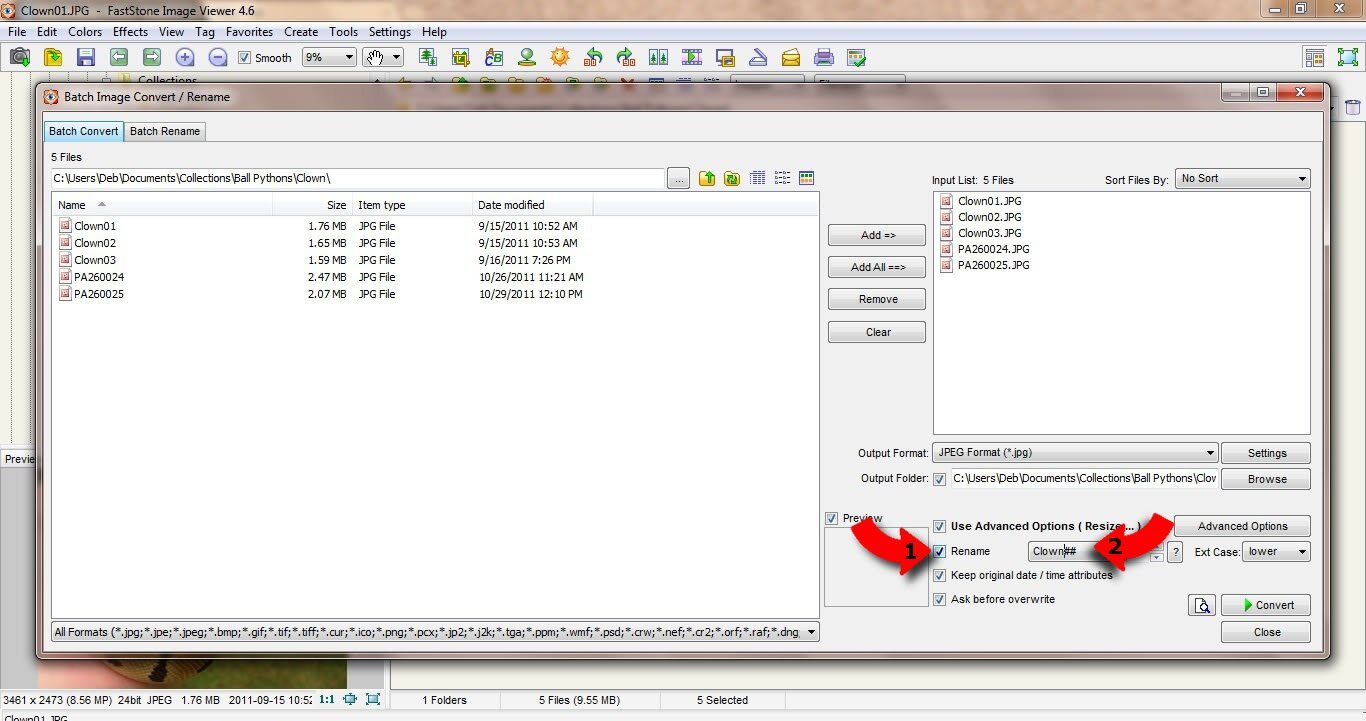
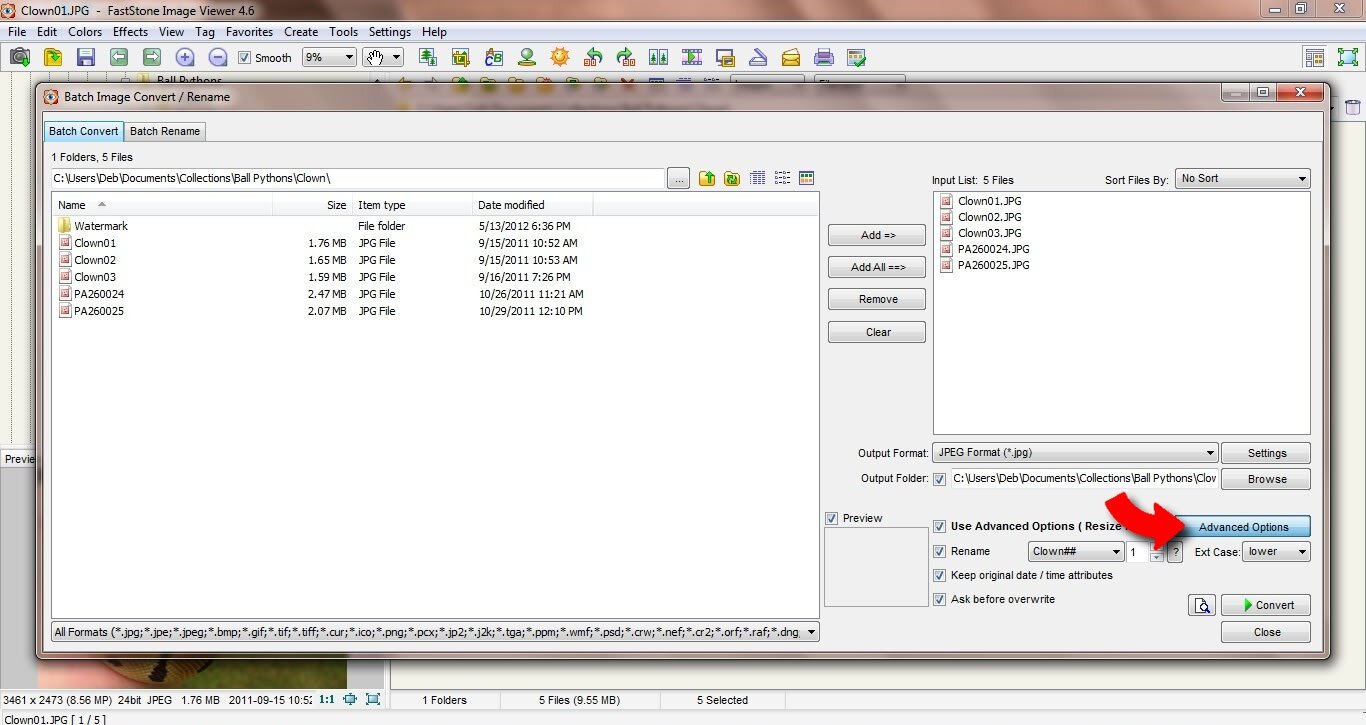
- Check the rename box (1) and enter the name you wish to use to rename your pictures followed by ## (ex: Clown##) (2)
- Now click on advanced options
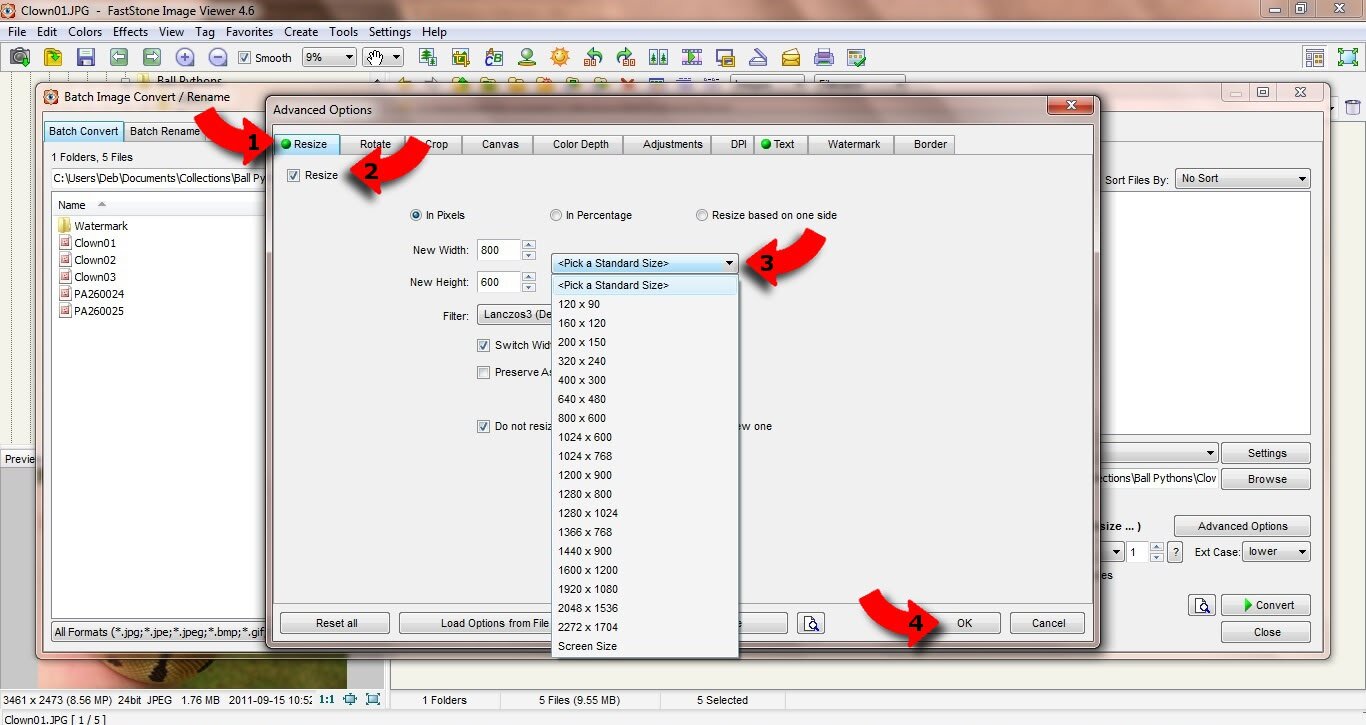
- Select resize (1), check the resize box (2), select a new size for your pictures (3) and click ok (4).
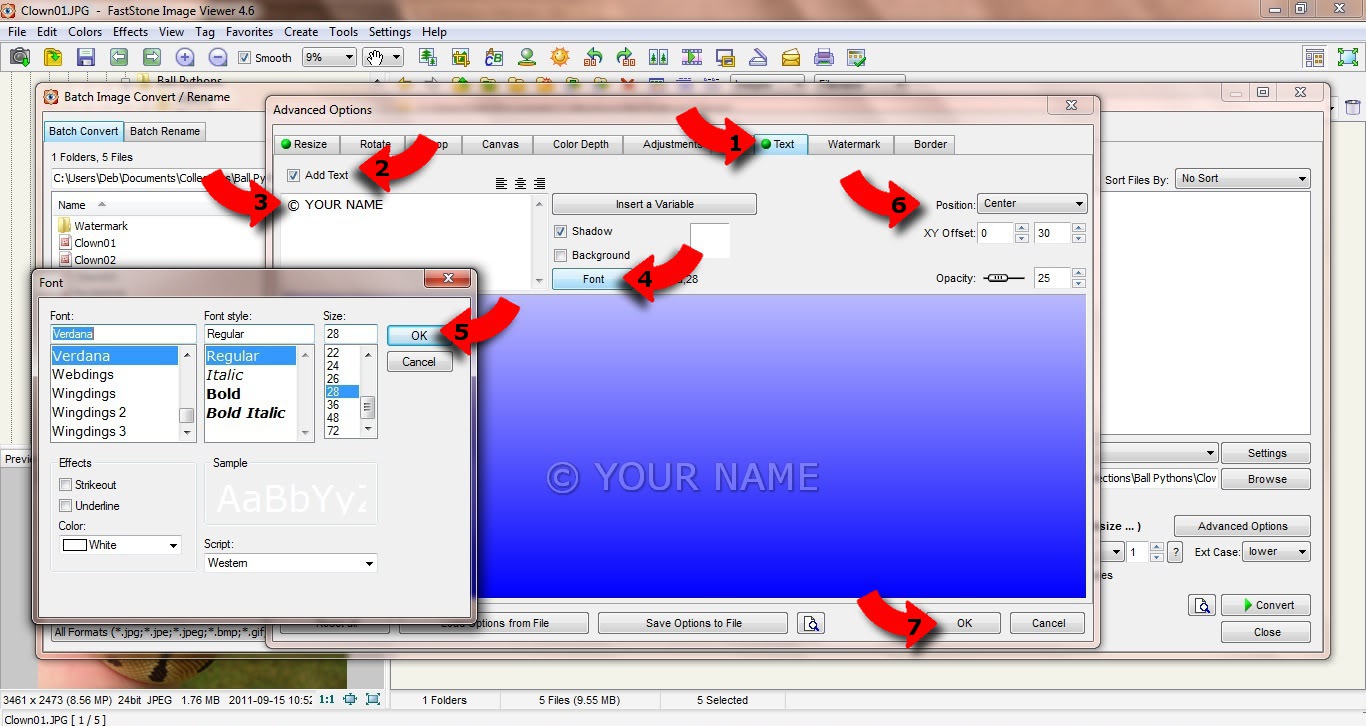
- Select text (1), check the add text box (2), write your name or company name (3), click font (4), select the font of your choice and click ok (5), select the position and opacity (6) and click ok (7)
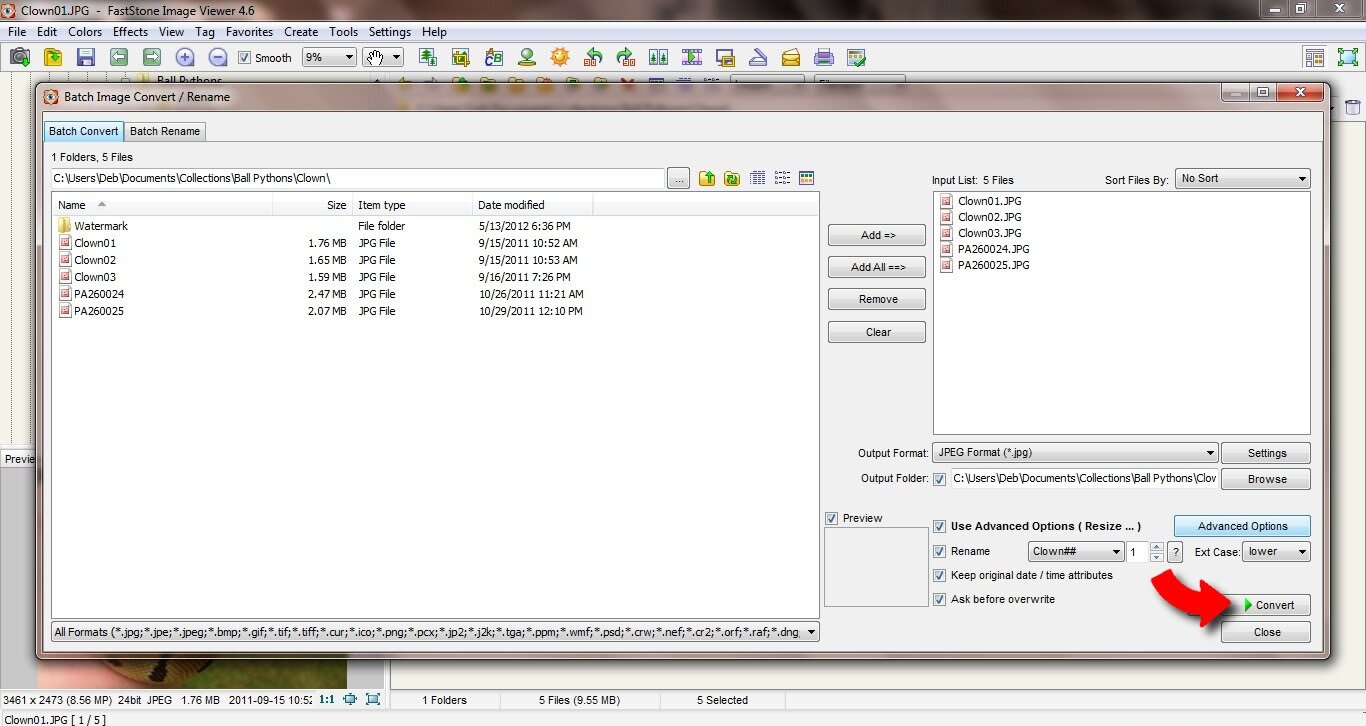
- Click on convert to convert/watermark your images.
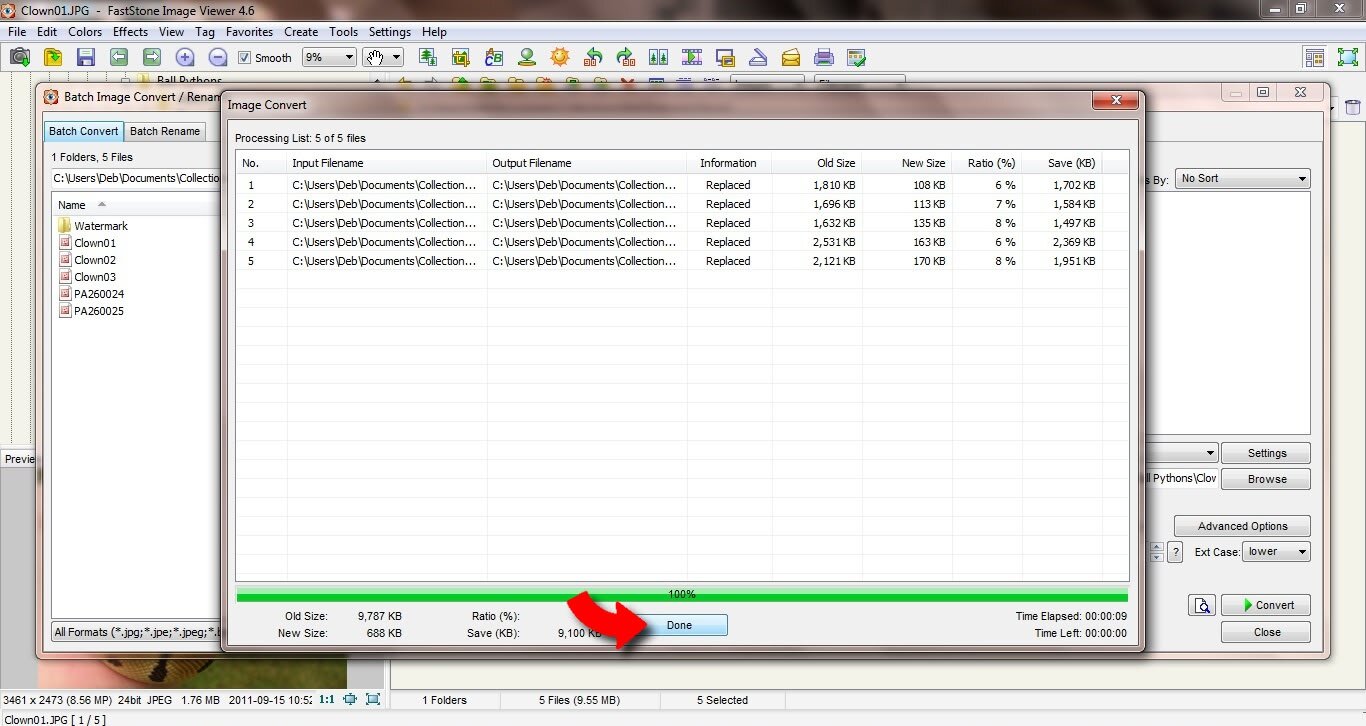
- Your pictures are now being watermarked, click ok when finished.
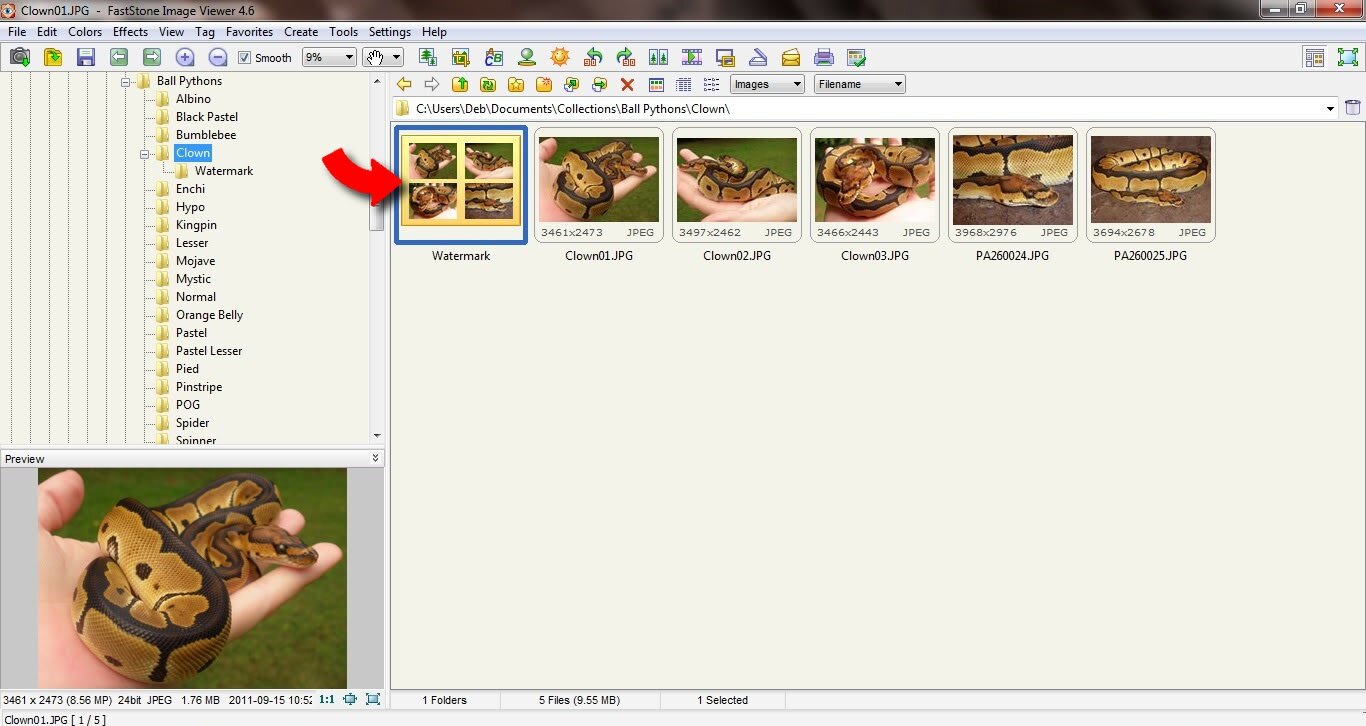
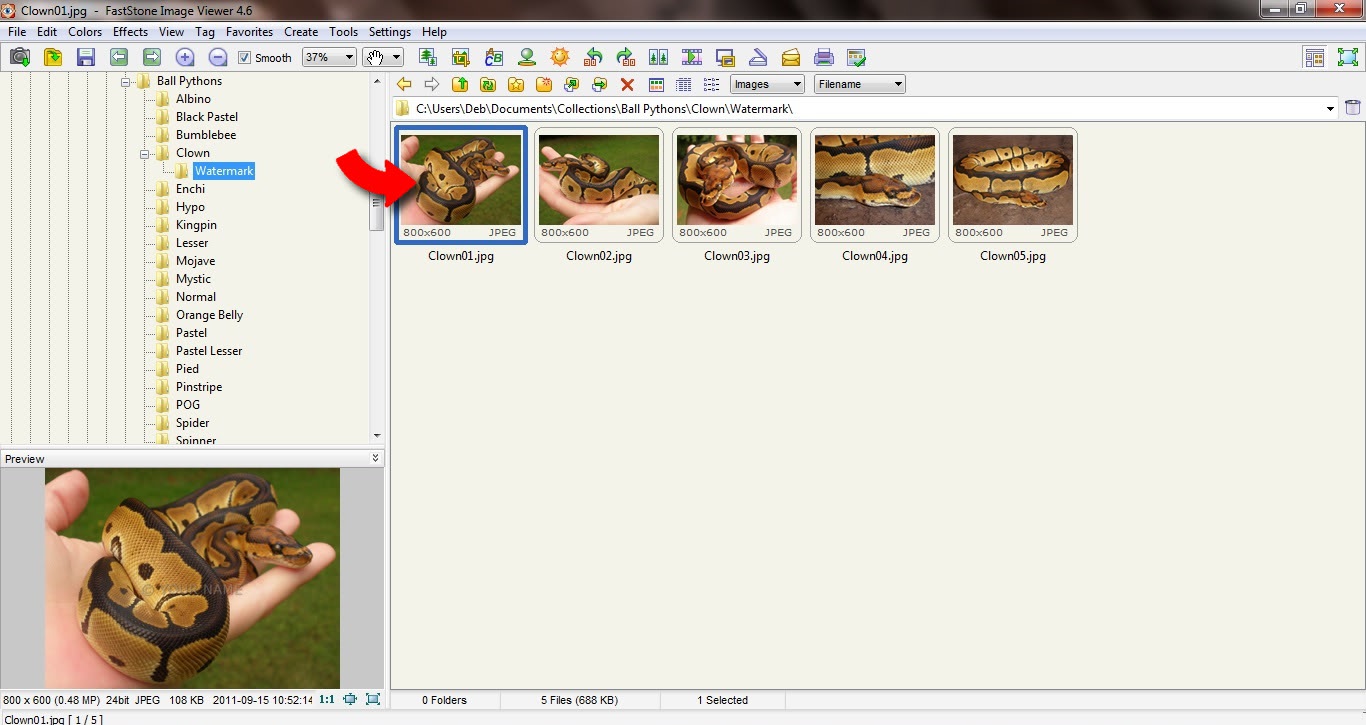
- Double click on the folder containing your watermarked pictures.
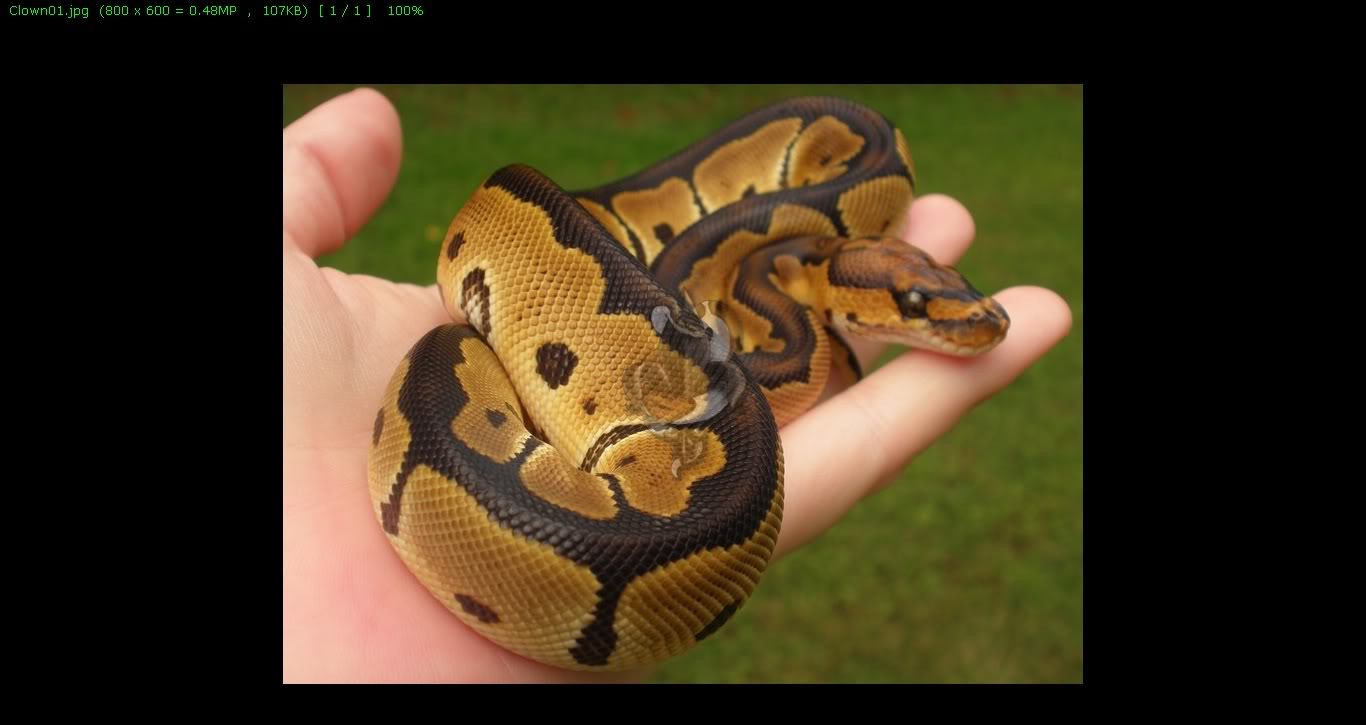
- Double click on any picture of your choice to verify your work.
3 Likes
Part 2
Watermarking using your Logo
First go to http://www.faststone.org/ to Download FastStone Viewer
- Launch FastStone program, click on file in the top left corner and open.
- Select the folder containing the pictures you wish to watermark (1&2) and click open (3).
- Highlight the images you wish to convert.
- Click right, select tools followed by batch convert.
- Click on browse to select the output folder.
- Click on create new folder.
- Name your new folder (1) and click ok (2).
- Check the rename box (1) and enter the name you wish to use to rename your pictures followed by ## (ex: Clown##) (2)
- Now click on advanced options
- Select resize (1), check the resize box (2), select a new size for your pictures (3) and click ok (4).
- Select watermark (1), check the add watermark box (2) and click ok (3)
- Click on … to select a watermark image.
- Select the folder containing your watermark image (1&2) and click open (3)
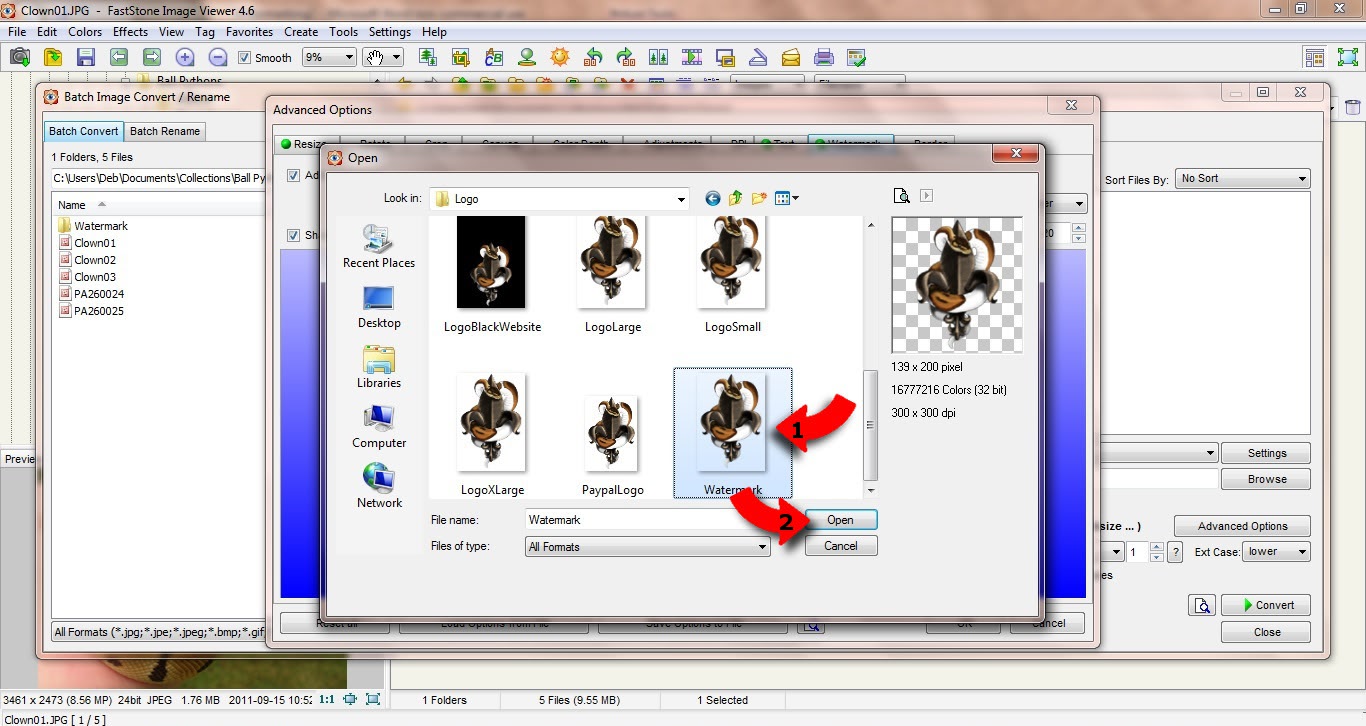
- Select the image that will become your watermark (1) and click open (2).
- Select the position for your image (1), select opacity (2) and click ok (3)
- Click on convert to convert/watermark your images.
- Your pictures are now being watermarked, click ok when finished.
- Double click on the folder containing your watermarked pictures.
- Double click on any picture of your choice to verify your work.
7 Likes
Thanks for the write-up. This was similar to what I would do in GIMP but much more streamlined and I really like the idea of batch marking
1 Like
You’re welcome it’s also great just to resize or rename a batch of pictures as well, saves time.
2 Likes
Thank you for putting it all together @Frenchie ! I will try it out soon! 
1 Like
wow! well thank you for all that it was very detailed I will give that a try.
1 Like